RSS Feed

Category Archives: Cook

New Sandwiches & Back-to-School

It’s that time of year, when kids all over go back to school. It’s the time of year for new clothes, anxious bus stop waits, and bagged lunches. I tried to think back at the lunches that were packed for me, and sadly, I couldn’t remember. Were they that unremarkable? I think I had a ‘Garfield’ lunchbox.

Fast forward a few decades. I still have a bagged lunch. This time, I make them myself. I pack lunches for work because I’d rather have good, inexpensive, homemade lunches than whatever fast-food restaurant lingers near my workplace. Many times, my lunches consist of leftovers, with each little component packed neatly in individual containers. You should see some of the little spreads I create. Hot and cold courses separated. Condiments at the ready. Dressings in their own little jars. Real utensils.

Sometimes, I just have a sandwich.

I made this chicken specifically to make into sandwiches. I’m adding more Middle Eastern-inspired flavors into my repertoire. I’m enjoying the unusual combinations of spices and ingredients. Well, unusual for the average American. The Middle East is an area of interest, one that could take up a post all by itself. In the meantime, I will share this little bit with you. (Stay tuned at the end of the post. I’ll share a few more favorite sandwich creations)

Chicken Doner from the wok

Adapted from Oriental Basics

For the meat:

  • 1 1/2 lb chicken cutlets
  • 2 stalks mint
  • 2 garlic cloves
  • 1 medium onion
  • 1 tsp each sweet paprika, ground cumin, & ground corriander
  • 4 Tbsp olive oil
  • salt & pepper

For the topping:

  • 1 small cucumber (less than 1/2 lb)
  • 1 garlic clove
  • 1 cup plain Greek yogurt
  • salt & pepper
  • 2 sweet onions, sliced
  • 2 tomatoes, sliced
  • 4-8 lettuce leaves
  • sesame buns or small pitas (I only had French bread)
Inspired lunch

Inspired lunch

1. Cut the meat into thin strips. Wash and dry the mint, then finely chop. Peel the garlic and chop very fine with onion in a food processor. (Alternately, finely chop garlic, and grate onion.)

2. Combine spices with the oil, mint, garlic and onion, and stir well. Stir in meat strips and toss to coat thoroughly. Cover and chill in the fridge at least 4 hours, occasionally stirring.

3. To make the topping, peel cucumber then halve lengthwise. Scrape out the seeds with a spoon. Finely grate the cucumber. Peel and crush the garlic clove, then add to the yogurt. Stir in the cucumber, then season with salt and pepper.

4. Preheat a wok or large, heavy skillet over high heat. Cook the meat strips in two portions, without oil, and stir-fry for 2-3 minutes. Keep cooked meat warm on a covered plate while cooking remaining meat.

5. Divide chicken between buns or pitas. Top with yogurt mixture, lettuce, tomato and onion.

More favorite sandwiches:

Roast beef, sharp cheddar & horseradish on sourdough

Roast beef, crumbled blue cheese, lettuce & tomato, oil & vinegar, on French bread (steak house salad on bread!)

Ham, brie, tart apples & Dijon on a baguette

Ham, Swiss or brie & chutney on Sourdough

Roast chicken, goat cheese & oil-packed sun-dried tomatoes on a baguette

Roast chicken, goat cheese & chutney on French.

Wrapped in waxed paper, these pack well for a out-of-the-ordinary office lunch.

Tuna & Olive Pasta, And Rachael Ray

Give me a chance to explain.

I know Ms Ray is generally vilified, what with her “EVOO” and “delish”, along with her annoying daytime television show. Many people have the right to be irritated by her. I am. Sometimes. But I have to admit, I used to watch the original ’30 Minute Meals’, and I own several of her cookbooks.

No, I usually cannot make those ’30 Minute Meals’ in 30 minutes, but I think Ms Ray was on to something. She makes real food. I mean, have you really looked at her recipes? Have you actually tried any of them? The ones I’ve tried have all been rather tasty. And every one of them calls for real food. Rarely they will ask for a a bit of tortilla chips, or a pre-packaged cornbread mix (Ray doesn’t bake), and the occasional pesto. She does choose ingredients for convenience and speed, such as chicken cutlets or frozen spinach, but it’s still good food…if you purchase the ones right for you. If you want to buy fresh, organic spinach and cook it down for a recipe, go for it. It’s a recipe, not a mathematical equation.

That’s what recipes are for…at least to me. They give you a guideline to follow, making adjustments or substitutions as you see fit. A recipe is a technique. Mix and match (or omit) ingredients depending on your mood or your market. Eat good food, and have fun.

The following isn’t a recipe by Rachael Ray, but it was inspired by her ‘Tuna Pasta Puttanesca’ in Just In Time.

Looks tasty to me

Looks tasty to me

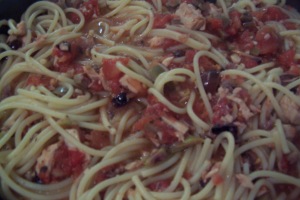
Spicy Tuna & Olive Pasta

  • 1/2 lb spaghetti, cooked
  • 2 cans tuna in water, drained
  • 2 cloves garlic, chopped
  • 1/2 tsp red pepper flakes
  • 1/4 c chopped mixed olives (I used a spicy mix from the olive bar at the market)
  • 14 oz. can diced tomatoes (I used a pint I had in the cupboard)
  • 2 Tbsp olive oil
  • scant 1/4 c vermouth

Heat olive oil in a large skillet over medium heat. Add garlic and pepper flakes, and cook until garlic is fragrant. Add tuna and olives. Cook for about a minute, then stir in the vermouth. Cook down the vermouth about 5 min, then add tomatoes. Simmer on low for 5-10 minutes. Add pasta to skillet and toss to combine. (I simmered it for a few minutes to allow the pasta to absorb some of the sauce.)

Spring stew & sunny day blessings.

I sat down and wrote up this post a little over two weeks ago. All I wanted was some belly warming food because of the chilly Spring. I didn’t realize, just two weeks later, I would want comfort food for a decidedly different reason. On a sunny April day – Patriot’s Day here in Massachusetts – two bombs exploded at a marathon, some 15 miles north of my workplace. Thankfully, I wasn’t affected, nor was anyone I know. But almost 200 were. It’s still a bit jarring to have a terrorist attack so close to home. Then the explosion happened in West, Texas. Such a week of tragedy.

I’m not going to give a long winded response of how things like this put things into perspective, or anything like that. I just am thankful that my loved ones, friends and I are still able to move about our lives, blessed with more sunny days.

So, I’m still going to share this post. What is below is what I originally wrote (pics later…) I hope everyone can be blessed with sunny days and good food.

The calendar says Spring, but the weather can’t decide. I usually don’t mind, but I really want some warm days that allow me to drive with the windows down. I want to sit on the balcony and sip coffee. Or a beer. Ah, to dream…

But no. The days have been a bit chilly still, or wicked breezy (like today). The night lows are still tickling the upper 20s and low 30s. Days like this call for hearty, cold weather food. Spaghetti with meat sauce is often a go-to dish. But I want stew. I’ve been seeing recipes all winter for lovely stews, but I never got around to making any.

I finally said “to heck with it” and bought the stew meat. Most stew ingredients I usually have on hand-carrots, onions, flavorings. Then I went looking for inspiration. Sadly, I came across a recipe at FoodNetwork.com that was perfect. It was simple. I only changed one thing; I used marjoram instead of thyme. And the results were amazing.

Beef Stew with Caramelized Onions and Amber Ale

  • 1/4 cup  vegetable oil
  • 2 1/2  beef stew meat,  cut into 1-inch  chunks
  • 1 1/2 pound  yellow onions, sliced
  • 1 tablespoon  butter
  • 2 teaspoons sugar
  • 2 tablespoons all-purpose (plain) flour
  • 1 1/2 teaspoons dried thyme
  • 3 carrots, sliced
  • 1 bottle good-quality amber lager or pale ale*
  • 1 cup  beef or chicken broth
  • 1 tablespoon tomato paste
  • Salt and ground pepper

In a large, heavy pot, warm the oil over high heat until hot but not smoking. Working in batches, brown the meat well on all sides, 5 to 7 minutes. Adjust the heat as necessary to keep the meat from scorching. Transfer the browned meat to a plate and repeat until all the meat is browned.

Add the onions and butter to the pot and stir over high heat until the onions start to soften, about 5 minutes. Reduce the heat to medium and sprinkle in the sugar. Continue to cook the onions, stirring occasionally, until golden brown, about 15 minutes. Add the flour, thyme and carrots and raise the heat to high. Stir for 1 minute, then pour in the lager or ale, letting it come to a vigorous boil. Stir in the broth and tomato paste and return to a boil.

Return the meat and any accumulated juices on the plate to the pot, let the liquid come just to a boil, then reduce the heat to low, cover, and simmer until the meat is tender when pierced and the sauce is slightly thickened, 1 1/2 to 2 hours. Season to taste with salt and pepper.
*I used Wachusetts Brewery’s Amber Ale
Read more at: http://www.foodnetwork.com/recipes/beef-stew-with-caramelized-onions-and-amber-lager-recipe/index.html?oc=linkback

Dreary days and spicy tomato soup.

Since I’ve been in Massachusetts there has been 4 snow storms. I’ve been here 2 months. Welcome to New England, right? I usually love snow, but this year I’m waiting for Spring. I’m craving brightness. I want the freshness of Spring. I guess I’m looking the rebirth that comes with the season to coincide with my new beginning. I’m waiting for the crocuses to emerge, the asparagus to appear in the market, the sun to warm my bones.

Bright flowers for a dreary day

Bright flowers for a dreary day

But right now it’s snowing.

The (financial) demands of moving have kept my cupboards lean. Thankfully I preserved a lot last summer, both in jars and frozen. (Yes, I packed up all my frozen produce and moved it from Ohio to Massachusetts.) Fortunately/unfortunately, you have to get creative sometimes during lean times. Sure, I have some preserved things, some beans (uncooked), rice, pasta…. But what to do when you don’t want to wait for beans to cook, and you’re tired of pasta with tomato sauce? Flipping through my cookbook collection just made me more frustrated as I kept finding recipes I wanted to make only to find I was missing a major ingredient. Normally, I substitute. Sometimes when I’m tired and hungry, I don’t want to think about flavor combinations and what could fill the giant void of ‘X’ main ingredient. Too technical. Blah.

So, I stared at my cupboard. Tomatoes. Chicken stock. Cumin. Onions. Tomato soup! Wait! I have squash in the freezer. Southwest-style tomato soup!

Warms from within

Warms from within

And here ya go…

Spicy Tomato & Squash Soup

  • 1 qt, or 1-28oz cans- chopped tomatoes
  • 1-2 c chopped zucchini, cooked
  • 1/2 med onion, diced
  • 1-2 jalapenos, minced (or any spicy pepper, such as chipotles)
  • 1 clove garlic, minced
  • 2 Tbsp tomato paste
  • 2 tsp cumin
  • 2 c chicken stock
  • 1/4 c chopped cilantro
  • salt & pepper to taste
  • juice of 1 lime (optional)

In a large pot, heat 1 Tbsp olive oil over medium heat. Add onion, jalapeno and garlic, and cook until onion is translucent. Add tomato paste, cumin, salt & pepper, thoroughly combining. Cook until tomato paste just takes on a brown color. Add tomatoes and zucchini; cook for 5 min. Finally, add chicken stock. Bring soup to a boil, reduce heat and let simmer for 30 min, stirring occasionally. Adjust seasonings as needed. Right before serving, stir in cilantro and lime juice.

Notes:

*I used yellow squash, but any summer squash will work. *Adding shredded rotisserie chicken will make a heartier soup. *Adding crisp tortilla strips and avocado will make this like a tortilla soup. *Switch up the cumin for other spices to take this soup around the world. *make this vegetarian by using vegetable stock or water.

A new chapter in New England. And baked beans.

A few weeks ago, I made the move from Ohio to Massachusetts. I’d visited Rhode Island many times, and love it up here. I figured I’d try to live up here for a bit. I mean, we only live once, right?

My new kitchen, while bigger than my previous kitchens, is in desperate need of counter space. It’s greatly lacking. And by lacking I mean non-existent. There is a built in hutch/cabinet made to look like a Hoosier cabinet that has some space, but not enough to do any work. Lucky for me, I own a 50s metal cabinet that is perfect counter height. It only offers about 3 feet of counter space, but it’s better than nothing!

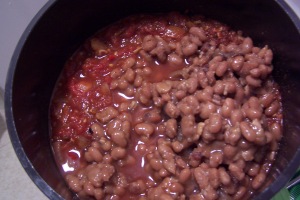
Inspired by my new digs, and the freezing temperatures, I decided to make a pot of traditional-style New England Baked Beans. I’ve made a few batches in the past, and I’m still tweaking the recipe, but this batch turned out pretty good. This is a good recipe to make for a crowd as it makes a lot. Lucky for you, I’ve included an idea of what to do when you’re sick of eating baked beans every day.

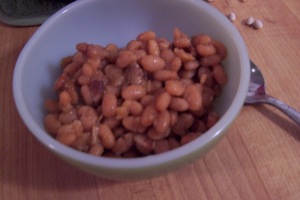
New England Baked Beans

  • 1 lb dried navy beans
  • 1/4 lb salt pork, or 1/2 lb bacon, chopped
  • 1 medium onion, cut into quarters, root end left on
  • 1/4 c brown sugar
  • 1/2 c real maple syrup
  • 1 clove garlic, minced
  • 1 tsp dry mustard
  • 1 tsp salt
  • 1 tsp pepper
  • whole cloves

Soak beans overnight.

The next morning, bring beans to a boil, then simmer until tender (parboil), 45-60 minutes. Preheat oven to 250°

Reserve 2 c bean cooking liquid.

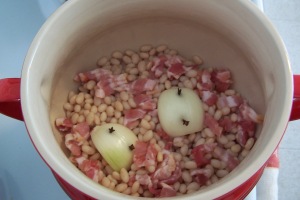
Stud onion quarters with whole cloves, 2-3 per quarter.

Baked Beans & chili 001

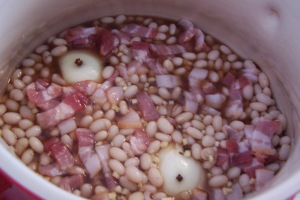
Fill  a bean pot (or deep casserole) with half of the beans. Place 2 quarters of the onion and 1/2 of the pork, or bacon, on beans, then fill with remaining beans. Top with remaining onion and pork, or bacon. Combine remaining ingredients with bean liquid; pour over beans.

Baked Beans & chili 002

Cover and bake 6-8 hours, checking occasionally to make sure it doesn’t dry out. Uncover the last 1/2 hour of cooking.

New England Baked Beans

New England Baked Beans

Baked Bean Chili

Amounts will vary depending on how much beans are left

  • left-over New England Baked Beans (I had almost 2 c)
  • crushed tomatoes (I used 1 jarred pint)
  • diced onion (1 small)
  • chopped, roasted chilies, jarred or frozen. (I used about 1/4 c)
  • garlic, minced
  • chili powder
  • cumin

Sauté onion and garlic in a large sauce pan until soft. Add chilies. Combine the rest of the ingredients in pan, and simmer, about 30 minutes. Serve with shredded sharp Vermont cheddar, crackers and diced onion. Or whatever you like on your chili.

Baked beans & chili fixin's

Baked beans & chili fixin’s

This is a unique, but surprisingly good, take on chili. It makes a thick, hearty meal. Great for chilly New England nights.

Yum!

Yum!

Election Day soup. A quick post

It’s that day again, the culmination of the long campaign season. We’ve had to endure ads, speeches and rallies. Now it’s the day to do your civic duty and vote. I don’t care who you vote for, as long as you do. And that’s as political as I’m going to get.

Most people will have to squeeze in voting between their lives, and then wake up tomorrow to find out who the next president will be. I would love to throw a returns watching party. I’m a bit of a geek that way. But I’m one of those that has to vote, then go to work. It will be late when I get home, so I’m just going to grab a bowl of soup and watch the returns.

Your civic duty

Since this is a food blog, I will share the recipe for my soup. It’s truly one of the easiest soups I’ve ever made. A great soup for busy people. And it’s great for chilly days.

French Onion Beef Barley Soup

  • 1/2 lb stew beef, cut into 1/2″ cubes
  • 1 medium onion, sliced thin
  • 1 Tbsp olive oil
  • 1 Tbsp butter
  • 4 c beef broth or stock
  • 2 c water
  • 3/4 c pearl barley
  • 1 tsp thyme
  • salt & pepper to taste

In a stock pot,  heat oil over med heat.Season beef. Brown beef in batches; set aside. Turn down heat to med-low.

In the same pot, melt butter. Add onion and cook slowly until caramelized, about 20 minutes. Return beef to stock pot. Add thyme, broth, water and barley. Bring to a boil. Reduce heat to low and simmer until barley is cooked, about 60 minutes.

Note: feel free to add diced carrots when you add the beef back to the pot.

Oktoberfest inspired meal

My little town just wrapped up their annual Oktoberfest celebration this past weekend. It’s the one thing in fall that people look forward to most, outside of football.

While not a fully German Oktoberfest, it definitely is a Ohio German-Catholic Oktoberfest. Plenty of beer (domestic, served in half gallon jugs), brats and tenderloins to go around. And Ohio State football on a large screen. Oompah bands play polkas throughout the fest, and there are plenty of fellow in lederhosen. Of course, there are typical small-town fest activities: Little Miss Oktoberfest, A Walk Through History, 10k run, arts & crafts and a parade. But it’s mostly an excuse to visit with friends, drink beer, and grab a bite.

It’s also an excuse for me to try German food. I’ve had some here and there in the past. I’m surprised I haven’t had more. I had a grandmother who came over on the boat. She wanted to be American, so all I remember that was close to “traditional” was ox tail soup. Which I’m sure I hated as a young girl. Now, I occasionally get a hankering to dabble in my heritage, usually around this time of year. There’s something about German food that screams ‘Fall” to me. It could be all that schnitzel, spaetzle, stews and cabbage. Hearty food.

This time around I opted for a non-traditional snack with traditional flavors, and an easy German stew. Both are super easy. Heck, the first one doesn’t even require measuring!

Pickled Beets & Goat Cheese on Rye Toast

  • Sliced rye bread, toasted lightly (1-2 slices per person)
  • Soft goat cheese (about 1/2 Tbsp per slice)
  • Pickled beets, sliced (enough to cover bread)

Spread goat cheese on the toast, and top with slices of beet. (I feel silly even typing instructions, this is so easy…but tasty!)

note: I made my own pickled beets using caraway, mustard and dill seeds as the spice blend.

Rindergulasch

adapted from food.com

  • 1 large onion, diced
  • 2 cloves garlic,chopped
  • 1/4 lb bacon, chopped
  • 2 lb stew beef, cut into 1″ pieces
  • 2 Tbsp bacon fat, or butter
  • 2 tsp paprika
  • 2 Tbsp tomato paste
  • 4 c beef broth
  • 1 large red bell pepper, chopped
  • 1/2 Tbsp dried marjoram
  •  salt & pepper to taste
  • egg noodles, or spaetzle

In a large Dutch oven or heavy pot, heat fat or butter until melted. Add beef in small batches  and brown on all sides, but not cooked through. Set aside. In the same pot, add bacon, onion, red pepper and garlic, and saute until they begin to brown, about 10 min. Return beef to pot add sprinkle with paprika. Whisk in the tomato paste until thoroughly blended. Add enough broth just to cover and bring to a boil, stirring the whole time. Add the rest of the broth a little at a time, bringing it to a boil each time. Reduce heat and simmer about 1 1/2 hour. In the last 15 minutes of cooking, add marjoram, and salt and pepper to taste. Spoon over egg noddles (buttered, if you like) or spaetzle.

Hoist a mug of beer and enjoy!

Vive la France!

If Mexico is a postcard of memories for me, then France is the stuff of dreams.

I’ve already professed my love of Mexico and it’s food, but it’s France that I turn to most. Not specifically all things French, but the ways of France. I’m not a true Francophile in that sense. I don’t need a house in Provence or an apartment in Paris. I follow the rhythms and flows. Hard to explain. Nothing is that much of a crisis that a well-timed shrug or a glass of wine can’t solve. Fresh food, in season, is the way to eat. Butter is OK. Cheese makes an amazing finish to a meal. Looking put together, even if just running into the quickie-mart, is a sign of respect (for yourself, mostly). Choose your passions, and stick to your guns, even if it is for a certain sporting team or a way to cook chicken.

I follow the Tour de France, and honor Bastille Day (both, I usually keep to myself). I like French food, but mostly the country or bistro style of cooking. I like French wines. Who doesn’t? I enjoy the vintage fashions of Dior and Givenchy. French cinema, however, is…meh. France is my dream vacation. Too bad the closest I’ll get is probably Quebec.

The more I write on this little ol’ blog, the more I want to share my memories. I’ve been lucky enough to experience a lot of things. A lot of those experiences are recalled by food. It’s the best scrapbook, making a meal and being able to share. Even if those memories are watching a bunch of cyclists race around France while drinking rose and eating pan bagnat.

Pan bagnat & Le Village blood orange-ade

So, in keeping with the last few posts (about memories and experiences), I’ve decided to share some French goodies. Memories in the making for me, new experiences for you.

Pan Bagnat

adapted from Susan Spungen’s Recipes

Vinaigrette

  • 1 large clove garlic, coarsely chopped
  • 1 tsp anchovy paste
  • 3 oil-cured olives, pitted
  • pinch of freshly ground black pepper
  • 2 Tbsp red wine vinegar
  • 6 Tbsp olive oil

Sandwich

  • 1 crusty French baguette
  • 1-2 roasted peppers
  • 1/2 c halved cherry tomatoes
  • 1/4 small red onion, thinly sliced
  • 1 can (6oz) light tuna, drained
  • 1/2 c oil-cured black olives, pitted and torn in half
  • 2 hard-cooked eggs, sliced
  • freshly ground black pepper

Make the vinaigrette by combining all the ingredients in a mini food processor or blender. Blend well, about 30 seconds, and set aside. This can be made several days in advance, and refrigerated.

Slice baguette lengthwise, toward the bottom third of the loaf and hollow out the top half. Spoon about two thirds of the vinaigrette on both side of the baguette. Layer the ingredients on the open baguette starting with the roasted pepper, followed by the tomatoes, onion, tuna, olives, then eggs. Drizzle remaining vinaigrette over the top. Sprinkle with pepper.

Close the baguette and wrap tightly in plastic wrap. Place in under a heavy cutting board and weigh it down with heavy pots for 1 hour. Slice and serve.

note: feel free to add greens or basil to the sandwich. This is the way I like it.

Onion tart & spinach salad with bacon


Free-Form Onion Tarts

adapted from foodandwine.com

Dough

  • 3/4 c all-purpose flour
  • 1/4 c whole wheat flour
  • 6 Tbsp cold unsalted butter, cut into small pieces
  • 5 Tbsp ice water

Filling

  • 4 Tbsp unsalted butter
  • 2 1/2 lb sweet onions, thinly sliced
  • 6 sprigs fresh thyme
  • 2 Tbsp creme fraiche (I used Greek yogurt and it worked just fine)
  • Salt & freshly ground pepper
  • 1 egg beaten with 1 Tbsp milk
  • blue cheese, crumbled (optional)

In a bowl, whisk the flour with the salt. Using your fingers, rub the butter into the flour until the mixture resembles coarse meal. Drizzle the water over the flour and stir gently just until incorporated; gently press to form a dough. Flatten the dough into a disk, wrap in plastic and refrigerate for 1 hour.

In a skillet, melt the butter. Add the onions and thyme and cook over moderately high heat, until softened, about 10 minutes. Reduce the heat to moderately low and cook, until the onions are golden, 20 minutes longer. Remove from the heat and discard the thyme. Stir in the crème fraîche (or yogurt) and season with salt and pepper. Let cool.

Set a pizza stone on the bottom of the oven or position a rack on the lowest rung and preheat the oven to 375°. Line a large baking sheet with parchment paper. Divide dough into quarters. On a floured work surface, roll out each quarter into a 6-inch round and transfer to the baking sheet. Spread the onions on the round, leaving a 1 -inch border. Fold the edge of the dough up and over the filling and brush the edge with the egg wash.

Free-form Onion Tart

Bake the tart on the stone or on the bottom shelf for about 20 minutes, until the  of the crust is browned. Transfer the tarts to a rack and let cool slightly. Top tarts with blue cheese crumbles (if using).

Serve with a a simple salad of greens topped with a simple vinaigrette.

Chicken Adobo Tacos, and a confession.

Ford Island

OK. I have a confession to make. I lived in Hawai’i for almost 3 years…and hated it. Well, not completely, but mostly. The reasons are too numerous to list here, but I will tell you that the tropical heat and humidity topped the list. There were a few things I miss about the place. Ford Island, where I lived. For those of you who know your history, that is the site of the Pearl Harbor attack in 1941. I love that era, so walking among American history every day was a privilege and a thrill. I was a 5 minute walk from the USS Arizona and USS Missouri. I could still make out the strafe marks on the runway made by Japanese bullets. I worked in a building that suffered slight shrapnel damage from a bomb. I was also a short drive from many other historical site on the island. A little Territorial Airwaves and I could almost imagine being there…

Strafe marks from 1941

As you can imagine, I also miss some of the food. I will occasionally make myself the parts of plate lunches I miss: loco moco, chicken katsu, or teri beef. Piled on a scoop of rice, all that’s missing is mac salad. And what about haupia, Dixie’s pineapple sour cream pie, or mochi ice cream? Oh, what I would do for a Leonard’s malasada! And I miss Filipino food. Pancit, lumpia, adobo. Ubiquitous when one thinks of Filipino food, but for a reason. The stuff is good. I used to be a Navy wife, so I lived and worked around a lot of Filipinos. I could get my fill any time a gathering took place.

Now I am in western Ohio. Not a huge Filipino population around here. Not much of anything around here. So I finally broke down and decided to make one of my Filipino favorites: chicken adobo. Chicken adobo is vinegary, sweet and salty. It’s often braised in a simple marinade and served over rice. I have no rice. So I made tacos. A bit of a twist on the classic, but with that same taste I remember. I think I hear a slack-key in the distance…

Chicken Adobo Tacos

adapted from FilipinoFoodsRecipes.com

  • 2 lb chicken pieces (I used thighs)
  • 1 head garlic, coarsely chopped (yep, the whole thing)
  • 1/4 c soy sauce
  • 1/2 c vinegar
  • 1 c water
  • 1 c chicken broth
  • 1 tsp ground black pepper
  • 1/2 c brown sugar
  • 2 bay leaves
  • 2 Tbsp olive oil
  • Cabbage slaw (technique below)
  • 6 in. flour tortillas

Put vinegar, soy sauce, water, broth, pepper and bay leaves in a heavy bottom pot. Cover and cook on low for 15 minutes. Meanwhile, heat oil in a skillet over medium heat. Saute the garlic until just brown and, with a slotted spoon, remove to pot of marinade.  In the same skillet, turn the heat to medium-high and brown the chicken pieces, 5 minutes on each side. Stir the brown sugar into the pot of marinade. Place chicken pieces in the pot and simmer, partly covered, until the chicken is cooked through, about 30 minutes. Set chicken aside to cool. Strain the solids out of the sauce and discard.

Meanwhile, make a simple cabbage slaw: toss 1/4 head of finely shredded cabbage with 5-6 shredded radishes and 3 sliced scallions. Sprinkle in 1 tsp sugar. Toss with 2 Tbsp rice vinegar and just enough mayonnaise to hold together.

Yum!

Shred chicken meat and place in a bowl with just enough sauce to moisten. (I boiled the sauce a little to reduce it.) Place about 1/4 c each chicken and slaw in the center of a warmed tortilla. Turn on some vintage hula music and enjoy.

Moving and Mexico

I recently moved from one apartment to another. While I did get a bigger kitchen, at least by square footage, I lost counter space and cupboards. It’s still a tiny kitchen, but I can still cook. In fact, the kitchen was the first room I unpacked. All of my dishes and pans are put in their place. All my spices and dry goods are set. The cookbooks take up several two-foot stacks against the wall. The rest of the apartment is mostly in boxes. I hate moving. I live among boxes for a long time until the new place “speaks” to me. I just don’t know where I want things until I live in a space for a while.

One box that did get unpacked was the collection of travel memoirs. You know, the Under the Tuscan Sun, Year in Provence-type books, and one called On Mexican Time. It’s a languid postcard from Mexico by Tony Cohan. There are no recipes or funny stories of locals, but a beautiful read none the less. It makes me long for Mexico.

I’ve been to Mexico just a couple of times. One time was a day/evening trip to Tijuana just to wander the streets, eating 3-for-a-dollar tacos and drinking Mexican Pepsi. The other trip was a 10-day excursion to Puerto Vallarta, for a honeymoon (for an ill-fated marriage).  That trip was spent mostly on Bahia Banderas at Juan’s beach shack, drinking Sol and eating whatever he caught that day. There was occasional forays into town, and brief sightings of whales.

What do I remember most from my trips to Mexico so long ago? Tortillas and the warmth of the Mexican people.

I have a soft spot in my heart for Mexico. I go through phases of food, but often go back to the simplicity of Border and coastal Mexican food. Re-reading On Mexican Time came at the right time. Making some sort of meal to put in tortillas is about as easy as it gets, and since I’d just moved…  I ended up trying homemade flour tortillas, re-fried beans and rice. I found a simple recipe -no lard!- for tortillas in my trusty Border Cookbook by Cheryl Alters Jamison and Bill Jamison. And surprisingly, a good recipe for beans in Better Homes and Gardens Mexican (2012). Some good, fairly authentic recipes in that magazine.

My very loved Border Cookbook

The flour tortillas came out quite tasty, but I needed to added a bit of salt to the beans. I’ve been eating everything in the tortillas all week. Give them a try for this weekend.

Texas Flour Tortillas

from The Border Cookbook

2 c all-purpose flour

1 tsp salt

1 1/2 tsp baking powder

1 1/2 tsp vegetable oil

3/4 c lukewarm milk or water

Sift together flour, salt and baking soda into a large bowl. Pour in the oil and mix with your fingertips to combine. Add the milk or water, working the liquid into the dough until a sticky ball forms.

Dust a counter with flour and knead the dough vigorously for 1 minute. The mixture should be “earlobe” soft and no longer sticky. Let the dough rest, covered with a damp cloth, for about 15 minutes. Divide the dough into 8 balls, and cover again with damp cloth, for about 15-30 minutes. (At this point the dough can be refrigerated for up to 4 hours. Bring the dough to room temperature before proceeding.)

Resting

Dust a counter with flour again and roll out each ball into a circle approximately 1/4 inch thick. *this was far too thick for me. I rolled them to about 1/8 inch and they were still too thick. Obviously, the thickness is up to you. These will be irregular shaped. If you want a perfectly round tortilla, feel free to cut into a circle. To avoid toughening the dough. try not to re-roll it.

No fancy gadgets needed

Heat a dry griddle or heavy skillet over high. Cook the tortillas 30 seconds on each side, or until the dough looks dry and slightly wrinkled and a few brown speckled form on both surfaces.

Almost done…

Keep warm in a cloth lined basket, or reserve for future use.

Re-fried Beans

adapted from Better Homes and Gardens ‘Mexican’ (magazine)

8 oz dried pinto beans (1 1/4 cups) (I used a combination of pinto and white beans. It’s what I had)

8 c water

1/2 tsp salt

2 Tbsp bacon drippings or olive oil

2 cloves garlic, minced

Rinse beans. In a large saucepan or Dutch oven combine beans and 4 cups of the water. Bring to boiling; reduce heat. Simmer, covered, for 2 minutes. Remove from heat. Cover and let stand for 1 hour. (Or place beans in water in pan. Cover and let soak in a cool place overnight.) Drain and rinse beans.

In the same sauce pan, combine beans, 4 cups fresh water, and the salt. Bring to boiling; reduce heat. Simmer, covered, for 2 1/2 to 3 hours or until beans are very tender. Drain beans, reserving liquid.

Mash away

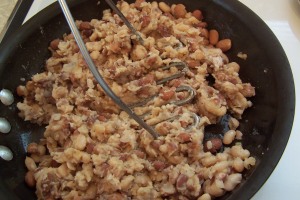
In a heavy large skillet heat bacon drippings. Stir in garlic. Add beans; mash thoroughly with a potato masher. Stir in enough of the cooking liquid (about 1/4 cup) to make a paste-like mixture. Cook, uncovered, over low heat for 8-10 minutes, or until mixture is thick, stirring often.*I added more salt because the beans were too bland for my taste.

Homemade re-fried beans…that taste good!

I served the beans and tortillas with a side of quick “Mexican” rice. That is, cooked riced with onions, salsa and spices. Leftover tortillas and beans make a great grab-n-go breakfast with the addition of some cheese, salsa and eggs. This style of tortilla would also make a good substitute for flat breads in a variety of Middle Eastern dishes. Heck, use them to make quick, individual pizzas. The possibilities are endless…